The 1992 Chevrolet Corvette (C4) is a classic American sports car known for its sleek design and high performance. However, as technology advances, many owners are upgrading their vehicle’s lighting system to LED tail lights for better visibility and a modern look. Replacing traditional incandescent bulbs with LEDs in the tail lights can sometimes cause hyper-flashing or malfunctioning due to the vehicle’s electrical system not detecting enough load. This is where LED load resistors come into play.
If you are looking for a guide on 1992 Corvette tail light removal for LED load resistor installation, this article provides a step-by-step process, tools required, troubleshooting tips, and everything you need to complete the upgrade successfully.
Why Upgrade to LED Tail Lights in a 1992 Corvette?
Switching to LED tail lights on a 1992 Corvette offers several benefits, including:
- Improved visibility: LEDs are brighter than stock incandescent bulbs, making your vehicle more visible at night and in bad weather.
- Longer lifespan: LEDs last much longer than traditional bulbs, reducing the need for frequent replacements.
- Faster response time: LEDs illuminate instantly when activated, which can improve safety by giving other drivers more reaction time.
- Lower power consumption: LEDs use less power, which helps reduce strain on your vehicle’s electrical system.
However, upgrading to LED bulbs may cause electrical issues such as hyper-flashing, malfunctioning turn signals, or warning messages on the dashboard. To fix this, load resistors must be installed.
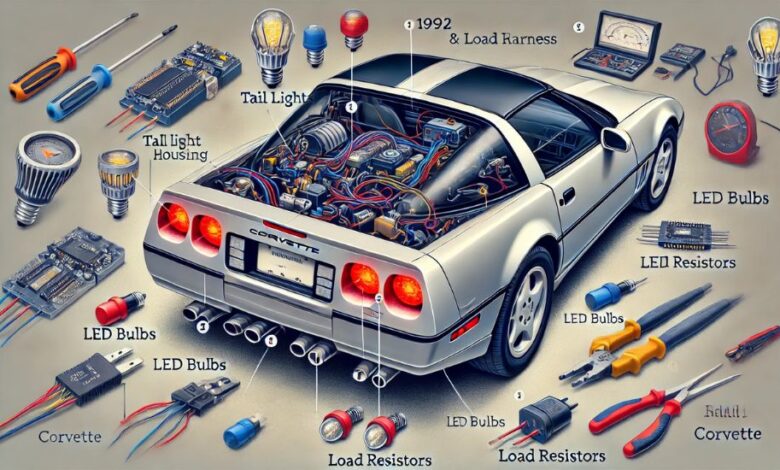
Tools and Materials Needed for Tail Light Removal and LED Load Resistor Installation
Before starting the process, gather the necessary tools and materials:
- Phillips screwdriver (for removing tail light screws)
- Flathead screwdriver (for prying plastic clips)
- Socket wrench set (for additional support if needed)
- LED replacement bulbs (compatible with the 1992 Corvette tail lights)
- Load resistors (6Ω 50W recommended) (for preventing hyper-flashing)
- Wire strippers and crimp connectors (for securing electrical connections)
- Electrical tape or heat shrink tubing (for insulation and protection)
- Multimeter (for checking voltage and wire polarity)
- Zip ties (for securing resistors in place)
Step-by-Step Guide: Removing 1992 Corvette Tail Lights
Step 1: Accessing the Tail Light Assembly
- Open the rear hatch to get better access to the tail light assembly.
- Locate the screws securing the tail lights. The 1992 Corvette tail lights are held in place by a few Phillips-head screws.
- Unscrew and carefully pull the tail light assembly out, ensuring not to damage any wiring connections.
- Disconnect the wiring harness from the back of the tail light housing by gently pressing the release tab and pulling the connector apart.
Step 2: Removing the Old Bulbs and Installing LED Bulbs
- Twist the old incandescent bulbs counterclockwise and pull them out of the socket.
- Insert the new LED bulbs into the socket and twist them clockwise to secure them.
- Before reassembling, test the LED lights by turning on the vehicle and activating the brake lights, turn signals, and reverse lights.
How to Install LED Load Resistors on a 1992 Corvette
Step 1: Identifying the Correct Wires
Since the 1992 Corvette does not have a CAN bus system, hyper-flashing can still occur due to lower resistance in LED bulbs. To fix this, follow these steps:
- Use a multimeter to identify the positive (+) and ground (-) wires for the turn signal and brake light circuits.
- Locate the correct wires in the tail light wiring harness. Typically:
- Red wire = Brake light
- Brown wire = Tail light
- Yellow/Green wire = Turn signal
- Black wire = Ground
Step 2: Connecting the Load Resistor
- Take the LED load resistor and connect one end to the positive wire of the turn signal/brake light circuit.
- Connect the other end to the ground wire.
- Use crimp connectors or solder the connections securely to ensure stability.
- Wrap the connections with electrical tape or use heat shrink tubing for added protection.
Step 3: Securing the Load Resistor
- Mount the load resistor on a metal surface (preferably inside the tail light housing or chassis) using zip ties or screws.
- Ensure the resistor is not touching plastic parts, as it can get hot during operation.
Testing the LED Tail Lights After Installation
After completing the installation, perform the following tests:
- Turn on the vehicle and test the brake lights to ensure they illuminate properly.
- Check the turn signals to see if hyper-flashing has been resolved.
- Test reverse lights to confirm all LED bulbs are functioning correctly.
- If issues persist, double-check wiring connections and resistor placements.
Common Issues and Troubleshooting
Hyper-Flashing Continues
- Ensure the load resistor is correctly connected in parallel with the LED bulb.
- Verify that the resistor is rated at 6Ω 50W.
- Check if the resistor is securely attached to a metal surface to dissipate heat properly.
LED Bulbs Not Lighting Up
- Reverse the polarity by flipping the LED bulb around.
- Check for loose wiring connections and ensure proper contact.
- Test the circuit with a multimeter to confirm power is reaching the bulb.
Resistor Overheating
- Ensure the resistor is mounted on a metal surface to dissipate heat.
- Do not place resistors near plastic or insulated areas to avoid melting or damage.
Final Steps and Reassembly
- Reattach the tail light assembly by securing it with screws.
- Double-check all connections and ensure no wires are exposed.
- Close the rear hatch and perform one final test to confirm everything is functioning correctly.
Conclusion
Installing LED tail lights in your 1992 Corvette can significantly enhance its appearance and visibility, making it a worthwhile upgrade. However, adding load resistors is essential to prevent hyper-flashing and ensure the electrical system functions correctly. By following this detailed guide, you can successfully remove the tail lights, install LED bulbs, and properly connect load resistors.
For more automotive tips and DIY guides, visit Mating Press.