Sometimes game art development might look like a simple process. It’s just artists creating images in ready-for-integration formats, right? What’s there to know besides deadlines and technical requirements, a client might ask. Any experienced game art studio will tell you it’s important for a client to understand what happens between the brief and delivery. And here is why.
What Are the Stages of the Game Art Creation Process?
Game artists go through several stages, from moodboarding and sketching to rendering. However, from the point of view of a client, the process looks like this:
- First Meeting (briefing)
- Proposal and Agreement (Contract and NDA Signing)
- Concept Art Creation
- Production
- Client Review
- Final Asset Delivery
- Post-Delivery Support
Most of this process looks familiar, but let’s take a closer look at the concept art creation stage.
How Do Concept Art and Style Guides Influence the Final Visuals?
When it comes to game art, there is no guarantee that the client will like the final result. To reduce the risk of this happening to a minimum, creatives use concept art and style guide. These are created and approved with the client early on to guide the team’s work.
Concept art by Kevuru games
Concept art shows the mood, shapes, and general look of the game early on. Style guides turn that into clear instructions — colors, line thickness, texture style — so every artist stays on the same page. Together, they keep all game visuals consistent and also help speed up production by reducing guesswork.
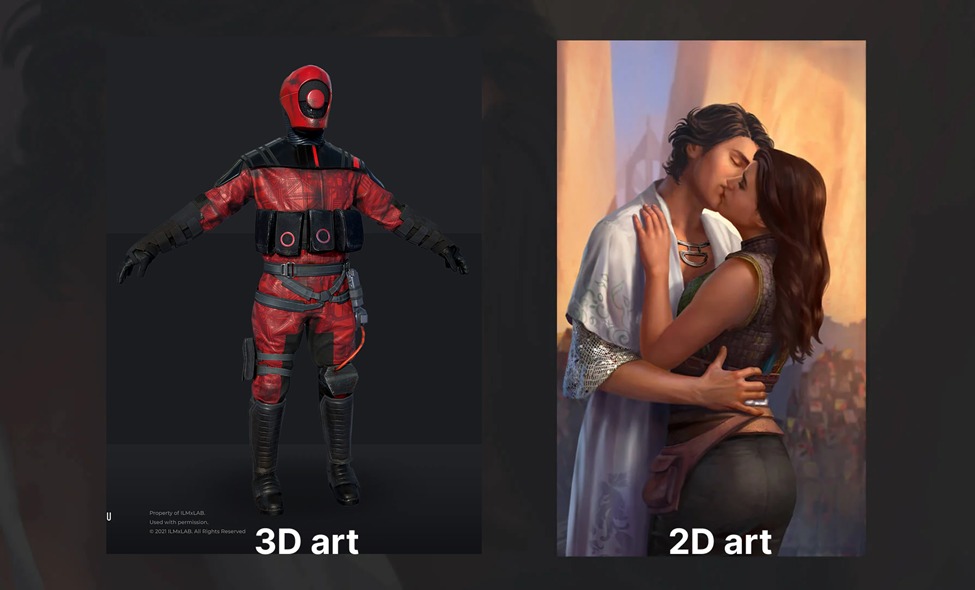
What’s the Difference Between 2D and 3D Game Art Production?
The main thing a client should understand about the difference between 2D and 3D Game Art Production is that the latter takes significantly more time. There are several stages in 2D game art production that are non-existent in 3D, such as retopology, UV mapping, baking, and texturing.
As a consequence, every correction that a client wants an artist to make will cost more in 3D game art. If saving time is a priority, 2D is usually the better choice.
How Is the Game Art Pipeline Structured from Sketch to Final Asset?
The structure starts with briefing, references, moodboard, and sketches for both 2D and 3D art, and both end with delivery, review, and post-delivery support. However, the middle stages of the pipeline differ significantly.
After the sketches are approved and the style guide is ready, the 2D art process goes on with lineart, cleanup, and then finalizing shapes and structure, coloring, rendering, and preparing for game animation if needed.
3D art process has a very different workflow — it starts with blocking, and then proceeds to high poly/sculpting, retopology, UV mapping, baking, and texturing.
What Level of Involvement Is Expected from the Client During the Process?
Client participation and feedback are needed at different stages of the process:
- At the start: approve style, moodboards, and references
- During sketches and concept art: give feedback on early drafts.
- Before rendering: approve lineart and models
- At delivery: confirm that final assets meet expectations
How Are Revisions, Feedback, and Approvals Handled Effectively?
To avoid misunderstandings and provide feedback that helps and not complicates the work, the client and game art company need to establish some key points beforehand:
- Set checkpoints for feedback and corrections.
- Define the number of revision rounds. Otherwise, revisions may continue endlessly.
- Select the key team member who is responsible for collecting client feedback and bringing it to the team.
And of course, remember the golden rule of every feedback for creative work: give clear, specific input — like “change color palette” or “adjust pose” — instead of general opinions like “make it more lively”.
What Tools and Software Are Commonly Used in Game Art Studio?
In gaming development, the choice of tools and software often depends on the project scale and style. Also, the choice of tools and software is a question of personal preferences of an artist. Some use the minimal amount of software, while others love to invent new ways and try new software.
For 2D art, common tools are Photoshop, Illustrator, Procreate, Blender, Figma, Stable Diffusion, MidJourney. For 3D art, the list would include Maya, 3dsMax, Z Brush, and others.
Conclusion
If you’re a client reading about the game art process before starting work — that’s already a great sign. It means you’re preparing for clear communication, realistic timelines, and smoother collaboration. Understanding how game art fits into the game development process helps you give better feedback, avoid delays, and get visuals that truly fit your game. And that’s exactly how great projects start.
Sometimes game art development might look like a simple process. It’s just artists creating images in ready-for-integration formats, right? What’s there to know besides deadlines and technical requirements, a client might ask. Any experienced game art studio will tell you it’s important for a client to understand what happens between the brief and delivery. And here is why.
What Are the Stages of the Game Art Creation Process?
Game artists go through several stages, from moodboarding and sketching to rendering. However, from the point of view of a client, the process looks like this:
- First Meeting (briefing)
- Proposal and Agreement (Contract and NDA Signing)
- Concept Art Creation
- Production
- Client Review
- Final Asset Delivery
- Post-Delivery Support
Most of this process looks familiar, but let’s take a closer look at the concept art creation stage.
How Do Concept Art and Style Guides Influence the Final Visuals?
When it comes to game art, there is no guarantee that the client will like the final result. To reduce the risk of this happening to a minimum, creatives use concept art and style guide. These are created and approved with the client early on to guide the team’s work.

Concept art shows the mood, shapes, and general look of the game early on. Style guides turn that into clear instructions — colors, line thickness, texture style — so every artist stays on the same page. Together, they keep all game visuals consistent and also help speed up production by reducing guesswork.
What’s the Difference Between 2D and 3D Game Art Production?
The main thing a client should understand about the difference between 2D and 3D Game Art Production is that the latter takes significantly more time. There are several stages in 2D game art production that are non-existent in 3D, such as retopology, UV mapping, baking, and texturing.
As a consequence, every correction that a client wants an artist to make will cost more in 3D game art. If saving time is a priority, 2D is usually the better choice.
How Is the Game Art Pipeline Structured from Sketch to Final Asset?
The structure starts with briefing, references, moodboard, and sketches for both 2D and 3D art, and both end with delivery, review, and post-delivery support. However, the middle stages of the pipeline differ significantly.
After the sketches are approved and the style guide is ready, the 2D art process goes on with lineart, cleanup, and then finalizing shapes and structure, coloring, rendering, and preparing for game animation if needed.
3D art process has a very different workflow — it starts with blocking, and then proceeds to high poly/sculpting, retopology, UV mapping, baking, and texturing.
What Level of Involvement Is Expected from the Client During the Process?
Client participation and feedback are needed at different stages of the process:
- At the start: approve style, moodboards, and references
- During sketches and concept art: give feedback on early drafts.
- Before rendering: approve lineart and models
- At delivery: confirm that final assets meet expectations
How Are Revisions, Feedback, and Approvals Handled Effectively?
To avoid misunderstandings and provide feedback that helps and not complicates the work, the client and game art company need to establish some key points beforehand:
- Set checkpoints for feedback and corrections.
- Define the number of revision rounds. Otherwise, revisions may continue endlessly.
- Select the key team member who is responsible for collecting client feedback and bringing it to the team.
And of course, remember the golden rule of every feedback for creative work: give clear, specific input — like “change color palette” or “adjust pose” — instead of general opinions like “make it more lively”.
What Tools and Software Are Commonly Used in Game Art Studio?
In gaming development, the choice of tools and software often depends on the project scale and style. Also, the choice of tools and software is a question of personal preferences of an artist. Some use the minimal amount of software, while others love to invent new ways and try new software.
For 2D art, common tools are Photoshop, Illustrator, Procreate, Blender, Figma, Stable Diffusion, MidJourney. For 3D art, the list would include Maya, 3dsMax, Z Brush, and others.
Conclusion
If you’re a client reading about the game art process before starting work — that’s already a great sign. It means you’re preparing for clear communication, realistic timelines, and smoother collaboration. Understanding how game art fits into the game development process helps you give better feedback, avoid delays, and get visuals that truly fit your game. And that’s exactly how great projects start.