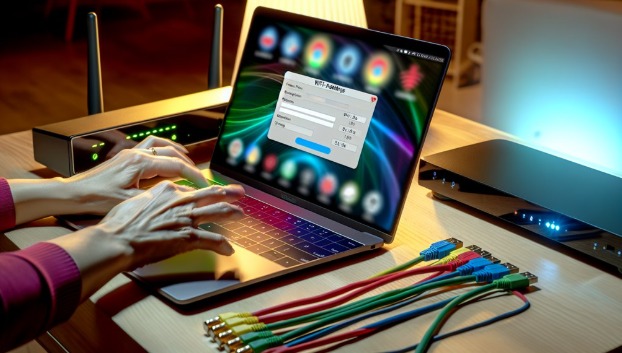
If you’re experiencing Wi-Fi adapter issues on Windows 11, you’re not alone. Many users face connectivity problems that can disrupt their daily activities. Fortunately, there are systematic steps you can take to troubleshoot and resolve these issues. From checking physical connections to adjusting settings, you’ll find effective solutions. But before you jump in, it’s essential to understand the common pitfalls that might be hindering your connection. Let’s explore these challenges together with LogKeys.
Common Wi-Fi Adapter Issues on Windows 11
Have you ever noticed your Wi-Fi connection dropping unexpectedly? This common issue on Windows 11 Wi-Fi Adapter can often stem from Wi-Fi interference. Nearby devices, like microwaves or cordless phones, can disrupt your signal, causing frustrating drops.
Additionally, adapter compatibility plays a critical role in your connectivity. If your Wi-Fi adapter isn’t fully compatible with your router or isn’t updated, you might experience frequent disconnects. Ensuring you’re using the latest drivers can make a significant difference.
It’s vital to check your adapter’s specifications against your network’s requirements. By addressing these common issues, you can improve your connection stability and enjoy a smoother online experience.
Don’t let Wi-Fi problems hold you back—act now to enhance your network performance!
Checking Physical Connections
Before diving into more complex fixes, it’s crucial to ensure all physical connections are secure.
Start by checking the cable integrity; damaged or frayed cables can disrupt your Wi-Fi connection. Look closely at the Ethernet or USB cables connecting your adapter to your computer or router. If you notice any issues, consider replacing the cable.
Next, examine the port status on both your computer and router. Ensure the ports are clean and free from dust or debris, as this can affect connectivity. If a port seems loose or damaged, try using a different port to see if that resolves the issue.
Taking these simple steps can often solve basic connection problems before you need to explore more advanced troubleshooting methods.
Restarting Your Computer and Router
If you’re still experiencing Wi-Fi issues after checking physical connections, restarting your computer and router can often resolve temporary glitches.
This simple step can significantly enhance your computer performance and ensure your router configuration is refreshed.
Here’s why you should give it a try:
- Improved Connectivity: A restart can fix connection drops and enhance stability.
- Quicker Response: Your devices may respond faster after clearing temporary issues.
- Better Speed: You might notice higher speeds after addressing background processes.
Updating Wi-Fi Adapter Drivers
Updating your Wi-Fi adapter drivers is crucial for maintaining a stable and fast internet connection. Outdated or incompatible drivers can lead to connectivity issues and slow performance.
To update your drivers, first, identify your Wi-Fi adapter model in Device Manager. Then, visit the manufacturer’s website to check for the latest version. When you find the appropriate driver, ensure it’s compatible with your version of Windows 11 before downloading.
Follow the installation instructions carefully; this usually involves running the downloaded file and restarting your computer. If you encounter any issues during driver installation, make sure to uninstall the old driver first.
Keeping your drivers up-to-date enhances network reliability and can resolve many connectivity problems.
Running the Network Troubleshooter
After ensuring your Wi-Fi adapter drivers are up-to-date, the next step is to run the Network Troubleshooter. This built-in tool can help identify and resolve connectivity issues quickly, allowing you to get back online without hassle.
To run the troubleshooter, follow these simple steps:
- Open Settings and select “Network & Internet.”
- Click on “Status” and then “Network troubleshooter.”
- Follow the prompts for network diagnostics.
By running the troubleshooter, you might uncover common problems, such as:
- Misconfigured settings that block your connection.
- Outdated configurations causing disruptions.
- Hardware issues preventing a stable connection.
Using this tool can save you time and frustration, restoring your Wi-Fi access efficiently.
Resetting the Network Settings
When you’re still facing Wi-Fi issues despite running the troubleshooter, resetting your network settings can often provide a fresh start.
To perform a network reset, go to Settings, then Network & Internet. Scroll down and select Advanced network settings, followed by Network reset.
This action will remove and reinstall all your network adapters and reset your adapter configuration to default. Keep in mind that you’ll need to reconnect to your Wi-Fi networks afterward, as this process will erase saved connections.
It’s a straightforward solution that can resolve lingering connectivity problems. After the reset, check if your Wi-Fi connectivity has improved, and enjoy a more stable internet experience on your Windows 11 device.
Disabling and Enabling the Wi-Fi Adapter
If your Wi-Fi connection isn’t working as it should, disabling and enabling the Wi-Fi adapter can often fix the issue.
You can easily access the network settings to reset the adapter and get things back on track.
Let’s explore how to do this step by step.
Access Network Settings
Accessing network settings to disable and enable your Wi-Fi adapter is a straightforward process that can often resolve connectivity issues. When you’re facing problems connecting to an access point, toggling your adapter can work wonders.
Here’s how to do it:
- Feel the relief of re-establishing your connection.
- Experience the joy of a stable internet after troubleshooting.
- Enjoy peace of mind knowing your network security is intact.
To disable the adapter, navigate to Settings > Network & Internet > Status, then click on “Change adapter options.”
Right-click your Wi-Fi adapter and select “Disable.” To enable it again, right-click the adapter once more and choose “Enable.”
This simple step can often restore your connection and improve your online experience.
Reset Wi-Fi Adapter
Resetting your Wi-Fi adapter can be a quick fix for connectivity issues that just won’t quit.
To start, right-click the Wi-Fi icon in your taskbar and select “Network & internet settings.” From there, navigate to the “Advanced network settings” section.
Under “More settings,” click on “Network reset.” This will disable your Wi-Fi adapter temporarily, which is essentially adapter resetting.
After a few moments, you can re-enable it by either restarting your computer or manually toggling the adapter back on. This simple step is often overlooked in Wi-Fi troubleshooting but can resolve many persistent problems.
If you’re still facing issues, further investigation may be needed, but this reset is a great first step.
Checking for Windows Updates
To fix your Wi-Fi adapter issues, you should start by checking for Windows updates.
Navigate to your update settings to see if any updates are available for installation.
Keeping your system up-to-date can often resolve connectivity problems.
Update Settings Navigation
Have you checked for Windows updates lately? Keeping your system updated is crucial for resolving Wi-Fi adapter issues.
To access your update settings, head to Settings > Windows Update. Here, you can manage your update preferences and receive update notifications to stay informed.
Consider these feelings when you check for updates:
- Relief: Knowing your system is protected with the latest fixes.
- Excitement: Anticipating potential improvements in your device’s performance.
- Empowerment: Taking control of your system’s health and functionality.
Don’t overlook this essential step. Regular updates can help maintain the stability of your Wi-Fi connection and improve your overall experience.
Installing Available Updates
After checking for updates, it’s time to install any available updates that can enhance your system’s performance and resolve Wi-Fi adapter issues.
First, click on “Install now” if updates are available. This process may take a few minutes, so be patient.
While installing updates, your system will automatically check compatibility to ensure everything works smoothly. If any driver updates for your Wi-Fi adapter are included, they’ll be installed, potentially fixing connectivity problems.
Once the installation is complete, restart your computer to apply the changes effectively.
Adjusting Power Management Settings
While you may not realize it, your Wi-Fi adapter’s power management settings can significantly impact its performance. Adjusting these settings can enhance your connection and make your experience smoother.
Here are some key points to consider:
- You might experience frustrating drops in connectivity.
- Slow speeds can hinder your productivity during crucial tasks.
- A poorly performing adapter can limit your online enjoyment.
To adjust your power settings, go to Device Manager, find your Wi-Fi adapter, and access its properties. In the Power Management tab, uncheck the option that allows the computer to turn off the device to save power.
This change can help ensure better adapter performance, keeping you connected when you need it most.
Removing and Re-adding the Wi-Fi Network
If you’re facing issues with your Wi-Fi connection, removing and re-adding the network can often help.
Start by forgetting the network in your settings, then reconnecting to it to refresh the connection.
This simple step might resolve the problems you’re experiencing.
Forgetting the Network
Wondering why your Wi-Fi connection keeps dropping? It might be time to forget and re-add your network. This simple step can often resolve pesky connectivity issues and improve your network security.
Here’s what you might be feeling:
- Frustrated with constant disconnections
- Anxious about forgotten passwords
- Tired of unreliable internet access
To forget the network, go to Settings > Network & Internet > Wi-Fi > Manage known networks. Select your network and click “Forget.”
Then, re-add the network by selecting it from the available options and entering the password. This process clears any corrupted settings and can help establish a fresh connection.
Taking these steps can restore your Wi-Fi stability, letting you get back to what matters most.
Reconnecting to Wi-Fi
Reconnecting to your Wi-Fi network can be a straightforward solution to persistent connectivity issues.
First, go to your Wi-Fi settings by clicking on the network icon in the taskbar. Select the network you want to reconnect to and choose “Forget” to remove it.
After that, click the same network again and enter the password, ensuring you have the correct credentials for network security. If prompted, make sure to select the option that allows your device to connect automatically in the future.
This process can refresh your connection, often resolving lingering problems.
If you’re still having trouble, consider updating your Wi-Fi adapter drivers or checking for any network-related updates in Windows 11.
Using Command Prompt for Advanced Troubleshooting
While troubleshooting Wi-Fi adapter issues in Windows 11, using the Command Prompt can provide you with powerful tools to diagnose and resolve problems effectively.
Here are some advanced diagnostics commands you can try:
- `ipconfig /release` and `ipconfig /renew`: Refresh your IP address.
- `netsh winsock reset`: Fix network socket issues.
- `ping google.com`: Test your internet connection.
Conclusion
In conclusion, if you’re facing Wi-Fi adapter issues on Windows 11, don’t worry—there are several steps you can take to resolve them. From checking physical connections to updating drivers and utilizing advanced troubleshooting commands, you’ve got the tools to enhance your connectivity. Remember to keep your system updated and adjust power settings as needed. By following these steps, you can restore your Wi-Fi connection and enjoy a seamless online experience. Happy troubleshooting!