A hammock stand is a great accessory that should be installed in each backyard or another outdoor area to have a comfortable corner to rest.
Although there are many ready-to-assemble hammock stands available on the market, constructing your hammock stand from the ground up has its benefits. It lets you choose what you want and where you want it.
This article will help you build a beautiful, durable wooden hammock stand that will be the ideal retreat for rest and relaxation.
1. Design and Planning
The first of those steps that must be taken when constructing your wood hammock stand is to decide the design of the stand and the size it is going to be.
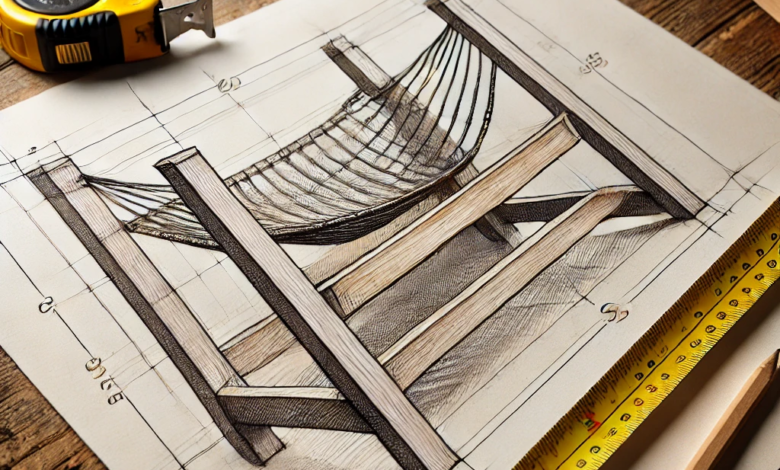
A regular hammock stand has four poles that extend from the ground, two tall and one short, crossing one another at about the height of the top of the hammock. Furthermore, the size of your hammock is an important consideration, and it should be in proportion to the size of your yard or the space that you have allocated for the hammock.
That said, a typical design consists of vertical poles that are 6-7 feet high and a foundation that is around 12 feet long and 4 feet wide. For this, you can make a rough sketch and record the dimensions and the angles of your design. It will act as a guide when the actual construction is being made.
Make sure to design it in a manner that offers adequate distance where the hammock can easily swing without touching the ground.
2. Preparing the Lumber
Once your design is ready, it’s time to cut the lumber to size. Begin by cutting the 4x4s for the base. You’ll need two pieces that are 12 feet long and two pieces that are 4 feet long. These will form the rectangular base of the stand.
Next, cut the 4x4s for the vertical posts. These should be 6-7 feet tall, depending on the height you want them to be able to reach.
For the top crossbeam, choose equal two-by-fours and lay them to a length of approximately 12 feet. You may have to increase or decrease this length depending on the size of the hammock that you want to make.
Lastly, saw the 2x6s for the diagonals for the strips. These should have one end tapered so as to be able to slot between the base and the vertical posts to give more support.
Once the lumber has been cut, smooth any uneven or splintered areas off the edges and surfaces using sandpaper or an electric sander. This is also an excellent opportunity to apply a layer of wood stain or paint if you choose to do so. Before moving further, let it completely dry.
3. Assembling the Base
With the lumber cut into sizes, it is now time to join the base of the hammock stand. Stack the pieces of timber on a flat surface so that each piece lays parallel to the other, about 12 feet in length, and has a 4-by-4-inch cross-section.
Place the 4-foot-long 4x4s in the middle of them at each end, arranging them to form a rectangle. Screw the corner together using wood screws and exterior wood glue to guarantee that the bottom is level and square.
It is also wise to lay other support pieces, such as wooden bars, diagonally across the four corners of the base for additional stability. Secure these supports with wood screws and glue.
4. Installing the Vertical Posts
Installing the upright pillars that will hold up the hammock comes next. Place one of the 6-7-foot 4x4s vertically against one end of the base about 12 inches in from the corner of the base.
To further secure them, they can be firmly fixed with the help of clamps while drilling holes for the carriage bolts. Fix the carriage bolts within the holes of the base and the posts and then proceed to drill through them. Screw them tightly using the washers and nuts, all with the help of the socket wrench. Perform the same for the second post.
Once the posts are in position, use a carpenter’s square to ensure that they stand vertically on the base. Screw it in as much as required and then only finally torque the bolts.
5. Installing Diagonal Supports
It’s critical to place diagonal supports between the base and the vertical posts of your hammock stand to provide stability. These supports will stop the stand from toppling over or swinging.
Place the 2 x 6 lumber diagonally between each vertical post and the base. Once you have determined the angle at which the lumber joins the post and base, make the necessary cuts.
Use wood glue and screws to secure the diagonal supports. Ensure that they are adequately supported and firmly attached.
6. Final Touches and Finishing
Now that the basic framework is built, it’s time to finish up your wooden hammock stand. Use sandpaper to smooth down any uneven surfaces or sharp edges throughout the stand.
It’s time to paint or stain the wood if you haven’t previously. If your stand will be kept outside, it is very important to apply a waterproof sealer to shield the wood from the weather.
Hang your hammock only after the paint or sealer has had time to completely cure. Make sure that all of the bolts and screws are snug and secure by checking them twice.
Conclusion
Crafting a wooden hammock stand from the ground up is a satisfying undertaking that enhances the look and feel of your outdoor area.
You can create a strong, customized stand that is ideal for your requirements by following the steps listed above.
Your custom hammock stand will offer a cozy place to unwind for many years to come, whether you’re basking in the sun or spending a peaceful evening outside.