A swimming pool is not just a recreational feature; it’s a canvas waiting to be adorned with elegance and style. Among the myriad of options available for enhancing your pool’s aesthetic appeal, tile installation stands out as a timeless choice. From classic designs to contemporary marvels, the transformative power of tiles can turn an ordinary pool into a breathtaking oasis. In this article, we delve into the realm of pool tile installation, exploring its benefits, design possibilities, essential considerations, and the process involved.
The Artistry of Pool Tile Installation
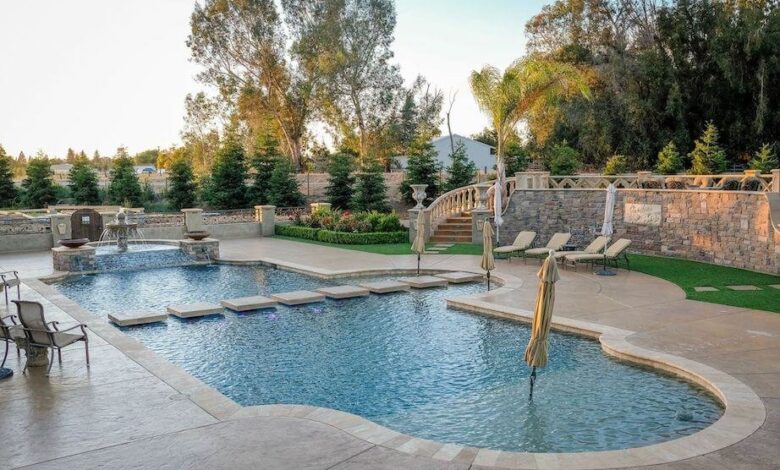
Pool tile installation is more than just a practical measure; it’s an artistic endeavor that elevates the entire space. Tiles offer a versatile medium for expressing creativity, allowing you to craft intricate patterns, dazzling mosaics, or sleek minimalist designs. Whether you seek a Mediterranean-inspired retreat, a modern sanctuary, or a tropical paradise, the right tiles can bring your vision to life.
Benefits Beyond Beauty
While the aesthetic appeal of pool tiles is undeniable, their benefits extend far beyond mere beauty. One of the most significant advantages of tile installation is durability. Unlike traditional pool finishes, such as plaster or paint, tiles are resistant to fading, chipping, and staining, ensuring long-term performance and aesthetic integrity.
Moreover, tiles provide superior traction, enhancing safety by reducing the risk of slips and falls, especially when combined with textured or non-slip surfaces. This makes them an ideal choice for both residential and commercial pools where safety is paramount.
Design Possibilities: From Classic to Contemporary
The design possibilities with pool tiles are virtually limitless, catering to a diverse range of tastes and preferences. For those inclined towards timeless elegance, classic ceramic or porcelain tiles offer a refined and understated charm. Their versatility allows for various color options and patterns, from soothing blues reminiscent of tranquil waters to earthy tones that blend seamlessly with natural surroundings.
On the other end of the spectrum, contemporary designs embrace innovation and boldness, utilizing glass, mosaic, or even metallic tiles to create striking visual statements. These avant-garde choices lend a sense of modern luxury to any pool space, reflecting light and adding depth for a mesmerizing effect.
Essential Considerations
Before embarking on a pool tile installation project, several essential considerations must be taken into account to ensure optimal results:
- Material Selection: Choose tiles specifically designed for pool use, as they are engineered to withstand exposure to water, chemicals, and fluctuating temperatures without compromising integrity.
- Maintenance Requirements: Consider the maintenance needs of different tile materials. While some may require regular cleaning and sealing to preserve their appearance, others offer low-maintenance solutions ideal for busy lifestyles.
- Budget: Determine your budget early in the planning process and explore cost-effective options without compromising on quality. Remember that investing in high-quality tiles upfront can save you money in the long run by reducing the need for frequent repairs or replacements.
- Design Cohesion: Ensure that the chosen tile design complements the overall aesthetic of your property, integrating seamlessly with existing architecture, landscaping, and outdoor decor.
- Professional Installation: Entrust the installation process to experienced professionals with expertise in pool tiling. Proper installation is crucial for ensuring durability, waterproofing, and structural integrity.
The Installation Process
The installation of pool tiles involves several steps to ensure a flawless finish:
- Surface Preparation: The pool surface must be thoroughly cleaned and prepared to ensure proper adhesion of the tiles. Any existing finishes, such as plaster or paint, may need to be removed or roughened to create a suitable substrate.
- Tile Layout: Before applying adhesive, the layout of the tiles must be carefully planned to achieve the desired pattern or design. This involves measuring and marking the pool surface, taking into account any curves or irregularities.
- Adhesive Application: Once the layout is finalized, a suitable adhesive or thin-set mortar is applied to the pool surface using a trowel. The tiles are then pressed into place, ensuring proper alignment and spacing.
- Grouting: After the adhesive has cured, grout is applied to fill the gaps between the tiles, creating a watertight seal and enhancing the overall appearance. Excess grout is wiped away, and the surface is cleaned to reveal the finished result.
- Sealing: Finally, the tiles are sealed to protect against water damage, staining, and discoloration. Depending on the type of tiles used, a suitable sealant is applied either to the tiles themselves or to the grout lines.
Conclusion
In the realm of pool design, tile installation reigns supreme as a transformative element that infuses elegance, durability, and style into aquatic spaces. Whether you seek a timeless retreat or a contemporary oasis, the versatility of pool tiles offers endless possibilities for customization and creativity.
By embracing the artistry of tile installation and considering essential factors such as material selection, maintenance requirements, and design cohesion, you can unlock the full potential of your pool, elevating it from a mere aquatic feature to a breathtaking masterpiece that captivates the senses and rejuvenates the soul. So, dive into the world of pool tile installation and unveil the elegance that awaits beneath the surface.