Solar energy is an increasingly popular and cost-effective solution for powering homes in Australia, a country blessed with abundant sunlight. For many homeowners, the process of installing a solar panel system can seem daunting. This comprehensive guide will walk you through everything you need to know about solar panel installation in Australia, from the initial research to post-installation maintenance, ensuring you make an informed decision and get the most out of your investment.
Understanding the Basics of a Solar System
A typical residential solar power system in Australia consists of a few key components that work together to convert sunlight into usable electricity.
- Solar Panels (PV Modules): These are the most visible parts of the system. Made of photovoltaic cells, they capture sunlight and convert it into direct current (DC) electricity. The type of panel you choose will affect your system’s efficiency and cost.
- Inverter: The inverter is the heart of the system. It takes the DC electricity from the panels and converts it into alternating current (AC) electricity, which is what your household appliances use. There are a few types of inverters, including string inverters and microinverters, each with their own pros and cons.
- Mounting System: This is the frame that securely fastens the solar panels to your roof. The design depends on your roof type and local wind loads, ensuring the panels are safe and stable.
- Smart Meter (optional but recommended): A smart meter replaces your old electricity meter, allowing you to track your energy consumption and the amount of electricity your system is exporting to the grid.
Planning Your Australian Solar Installation
Before you even get a quote, there are a few crucial steps to take to ensure your home is suitable for solar.
Assess Your Energy Needs
Review your past electricity bills to understand your average daily and monthly energy consumption (measured in kilowatt-hours, or kWh). This will help you determine the ideal size of your system. A system that is too small won’t meet your needs, while one that is too large may be an overinvestment.
Evaluate Your Roof
The success of a solar installation largely depends on your roof. The ideal roof is north-facing (for optimal sun exposure throughout the day), has a good tilt angle (typically between 20° and 30°), and is free from any shading issues from trees or buildings. A professional installer will conduct a site assessment to confirm your roof’s suitability and structural integrity.
Understand Costs and Incentives
The cost of a solar system in Australia can vary significantly based on its size, the quality of components, and the complexity of the installation. For a standard residential system (around 6.6 kW), you can expect to pay anywhere from AUD 3,500 to AUD 9,000, with larger systems costing more.
A major factor in the affordability of solar in Australia is the Small-scale Renewable Energy Scheme (SRES). This federal government program provides a financial incentive in the form of Small-scale Technology Certificates (STCs). Your solar installer or retailer will typically apply for these STCs on your behalf and apply their value as an upfront discount on the total cost of your system. The number of STCs you receive depends on your system size and location, and the program is scheduled to be phased out by 2030, so the rebate decreases each year.
The Solar Panel Installation Process
Once you’ve done your research and chosen a reputable installer, the process typically follows these steps:
Step 1: Choosing a Reputable Installer
This is perhaps the most important decision you’ll make. Look for a solar retailer and installer who is accredited by Solar Accreditation Australia (SAA). This ensures they meet industry standards and that your system will be eligible for STCs. Don’t be afraid to get multiple quotes and ask for references. Check online reviews and ask questions about the brands they use, their experience, and their workmanship warranty.
Step 2: System Design and Approvals
The installer will design a custom system based on their site assessment and your energy needs. They will also handle all the necessary paperwork, including the application for grid connection with your local electricity network provider and any permits required by local authorities.
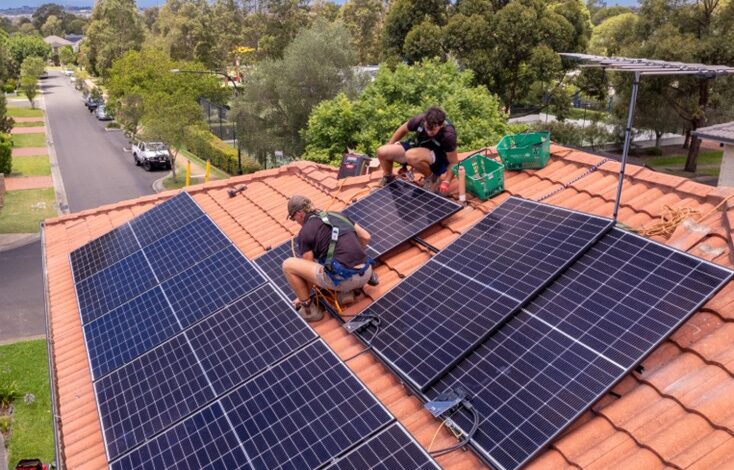
Step 3: Installation Day
On the day of installation, a qualified team will arrive to mount the racking system, install the solar panels, and connect all the electrical components, including the inverter and the smart meter. For safety, it’s best to be at home to answer any questions the installers may have. The installation can take anywhere from a single day to several days, depending on the system’s size and complexity.
Step 4: Final Inspection and Activation
After installation, a final inspection is conducted by a qualified electrical inspector to ensure the system complies with all safety standards. Once approved, your electricity retailer will be notified, and you’ll be connected to the grid. Your system will then be switched on and start generating power!
Post-Installation: Monitoring and Maintenance
Congratulations, your system is up and running! But the journey doesn’t end there.
- Monitoring: Most modern solar systems come with a monitoring app that allows you to track your system’s energy production in real time. This is a great way to ensure your system is performing as expected and to identify any issues early on.
- Maintenance: Solar panels require minimal maintenance. Rain often helps to keep them clean. However, a light cleaning with a hose a couple of times a year is recommended to remove any built-up dust or bird droppings, ensuring optimal performance.
- Warranties: Familiarize yourself with the various warranties that come with your system. These typically include a product warranty for the panels and inverter, and a workmanship warranty from the installer.
By following this guide, you can confidently navigate the world of solar panel installation in Australia, reduce your electricity bills, and contribute to a cleaner, more sustainable future.